


Welcome to Funky Cards and

Good morning and welcome back to My Cricut Craft Room Card Creating Tuesdays. I hope to inspire you with my work today and to encourage you to try something new! As you know, each week I will be sharing with you new cards that I have designed and adding a few tips that I have learned along the way.
Well, it's official. The nest is getting a little emptier. Sorry Mom and Dad:(

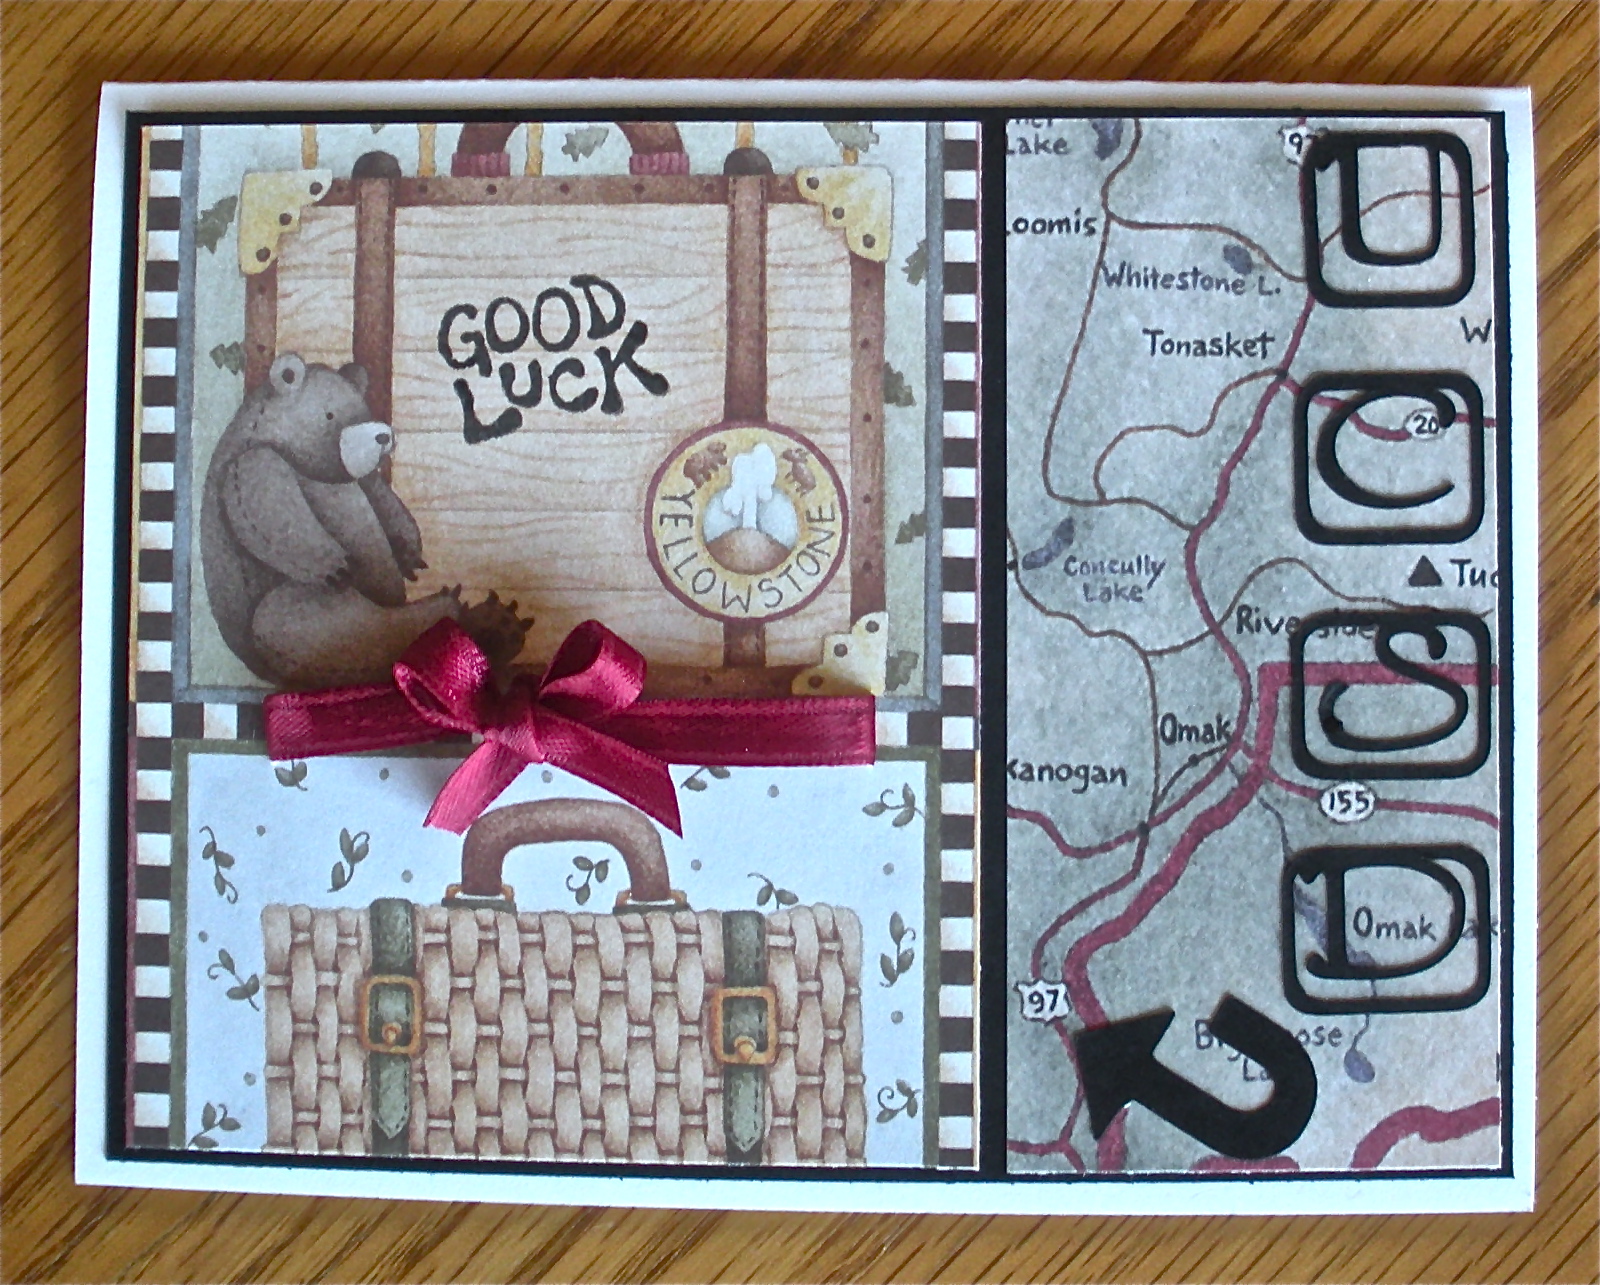
I thought it would be fun to mix and match this Debbie Mumm paper and create a fun going away card. Two different background papers were used to create this look. The letters U. C. S. D. and an arrow were added to the map to point to where Aaron was headed. "Good Luck" was stamped onto the suitcase using the Our Craft Lounge Clear- "Shout It Out" Stamp Set.
Recipe:
Our Craft Lounge Clear- "Shout It Out" Stamp Set
Tear Drops Cricut Cartridge- U. C. S. D.
Going Places Cricut Cartridge- Arrow
Debbie Mumm paper
Tear Drops Cricut Cartridge- U. C. S. D.
Going Places Cricut Cartridge- Arrow
Debbie Mumm paper
Ribbon
***Tip of the Day***
If you missed my previous tips, you can click:
*Adding ribbon*- If you want to add ribbon to your card, you need to attach the ribbon to the patterned piece of paper before you tape the patterned paper to the card stock. This will keep the card looking clean and hide the back side of the ribbon. (This is the back side of the patterned paper). Once the card is finished, this strip of ribbon will not show.

Make two slits by sliding your paper under a paper trimmer and running the blade down approximately 1/4". The slits should be wide enough for the ribbon to slide through. Now turn the paper over.

Your ribbon will look like this. You can tie it in a bow if you want. Now you can tape the patterned paper to the black card stock and the ribbon will be hidden between the two pieces of paper giving the card a nice clean look:) If you have any questions, please feel free to email me anytime at funkycards @ charter dot net (no spaces).
~Madison


What a great card for your brother Madison! I think my favorite part is the map with the arrow indicating his destination. How cool is that?! :)
ReplyDeleteNita
Awesome card Madison! Very creative! I always enjoy reading your tips! Thanks for sharing your beautiful projects and great tips with us!
ReplyDeletevery sweet card
ReplyDeleteBoy Madison you are awesome! This card is awesome and thanks for the ribbon help!
ReplyDeleteYou have a very unique style Madison, love it!
ReplyDeleteSuper cute card!! Love it!
ReplyDelete♥ Laura ♥
tweetyb@satx.rr.com
http://laurascraftsandmore.blogspot.com/
oh how cute!
ReplyDelete